

STUCCO INSTALLATION GUIDE
Tools of the Trade
When you see the carving tools you will believe that they are simple and easily substitutable – they are not extremely technical tools. In fact, in some cases, you will use a flat head screwdriver, a brick tie or the like. Also, the tools can be bent, using needle nose pliers to create unique shapes to the carving results. Something you could not do with a “butter knife.”
The carving tools are standard sculptors’ tools that have been bent in a variety of shapes as needed for the job. Flat head screwdrivers also serve as a useful addition to the approved tools.

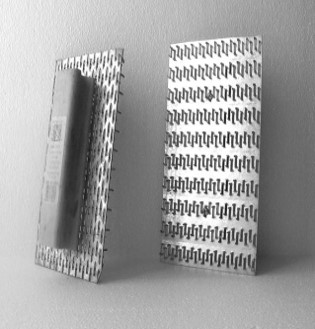
Handheld graters are used to shape details like corner stones. The grating is usually done near the end of the day when StoneCoat® is hard enough to grate off like hard cheese.
Carving Tools
There are several carving tools. You may find many of them simple and may even think that they are too simple. However, you must use the products on the Material list of StoneCoat®. The reason for this is that we MUST maintain a standard. If everyone is using the same, then the standard is met
What you will be trying to achieve with the tools is a natural looking, man-made mortar or grout line.
The carving knives can be bent with needle nose pliers to make the width and even the shape of the grout line, as well as the depth. The knives are purposely lightweight (lighter than a kitchen or table steak knife). This ensures that you carve just to the appropriate depth. Too heavy a tool may make you carve too deep. You do not want to have to patch an area, match the pigment and wait for it to dry enough to repair.
The tip of the carving tools, as mentioned before, can be adjusted by bending them. In the case of outlining or sculpting you will want a straight blade. In the case where you want a wide grout line, a large ½ in. circle bent at the tip should be adequate. If you want a square or flat grout line you may want to bend the knife into a square tip, as wide as you want the grout line to be, or you may opt for a wide flat head screwdriver.
The trowels are used for smoothing the surface or working the corners, especially if the corners are big blocks. You will note that one of the trowels has small teeth. This will ensure that the product is “sanded” down as you work with it. DO NOT USE SANDPAPER. Use the grating trowel. The product will be too moist for sandpaper to be effective. It should not leave teeth marks or lines, unless this is the look you want.
The customer sometimes desires the smooth surface finish. In this case a flat trowel is used to finish out the surface smoothly to achieve the sought-after result.
TIPS:
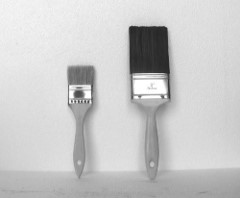
- Clean, simple, paint style brushes are used to frequently brush mortar lines as they are carved. A larger brush is effective in brushing the whole job at the end of the day.
- One of the main characteristics of our coatings is that the final result is done with “clean” grout/mortar lines. This is what makes your stone stand out. So regularly brush your lines to keep them debris free. The debris may “cure” and cause a sloppy look.
- Be sure to keep your carving tools clean and free of rust You are working with humid material and your tools may rust. If they are not free of rust, you may end up adding rust color to the carved grout lines and have to re-do some sections.
- Remember, always try to imagine your grout lines as if stacking stones created them. Grout lines that do not look natural will not reflect quality. Also, do not make them too wide, as they will look like a “sloppy” mason worked on the walls.
Material list for one installation team:
Mixing:
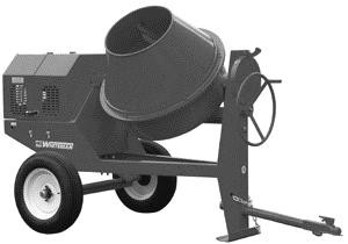
- 1 x 6 cu ft minimum professional grade Concrete electric or gas mixer. Recommended Mixer is Multiquip 5.5 Hp Honda, 6 cu. ft., steel Drum mixer. A smaller and less expensive alternative is Altrad BI 135.
- 1 x 100 ft water hose with spray gun
- Plastic, rubber Gloves
- Dust masks
- Plastic protection goggles
- Cup dosage Kit
Before spraying:
- 2 x 6 cu ft wheel barrels
- 3 x 18 US quarts Heavy-duty rubber pail with pouring lip
- 1 x 20 feet heavy-duty rope
- 2 x mortar pans (30 x 30 x 7)
Spraying
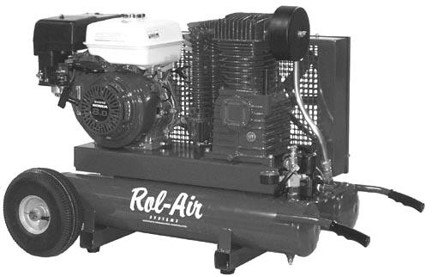
- Sprayer: 25 CFM @ 120 PSI gas air compressor, 2 stage with, max 150 psi capacity. We Recommend:
Rol-Air. It has a 9-gallon tank capacity. For longer life consider the 20-gallon model.
- Enduivit hopper
- 100 feet air compressor flexible fitted with quick release
Applying coloration and carving
- 5 x 5-gal translucent container with cap
- 1 x 3HP 20-Gal electric air compressor (optional)
- 4 x Air paint guns with reservoir and quick release fittings, or air brush system.
- 2 x graters 15mm
- 2 x graters 8 mm
- 10 x Stoner carver tool
- 2 x 2” paint Brush + 2 x 1” paint brush
- 2 x soft brushes
Cleaning
- 1 x Shovel
- 1 x Broom
- Rough surface floor broom
- 14” floor Scraper
- 1 x heavy-duty bag less vacuum cleaner
1 toolbox with various tools
- Mallet
- Hammer
- Tape measure
- 2 Levels (1 long and 1 short)
- Stapler Gun x staples (heavy duty for lathing)
- Pencils
- 1 x Metal wire brush
- 2 x Utility knives
- 2 x Trowels
- 2 x gauging trowels
- 4” joint knife
- Notched Trowel (triangular teeth) ¼ by 3/16
- Dustpan
Other needed items
- 2 x 100ft 16 gauge reeled extension cords
- 1 x stepladder 10 ft
- 1x 20 feet scaffold (can be used by more than one team depending on the jobs)
- Floor protection sheets (3 feet x 20 feet roll of used carpet)
- Heavy-duty tape
- Plastic Roll
Site Preparation
This is a very critical part of the job. Remember: “Whatever you apply StoneCoat® on, will determine the future stability and durability of the product.” In other words, if the substrate is in poor condition, damaged, in need of repair and you go ahead and spray over it without repair or proper preparation, you have failed. You will not see it at first, but over time it will show, and your customer will be calling you to complain, or worse, tell his neighbor and everyone at work that StoneCoat® is not a good idea.
The product can be applied on external surfaces and internal surfaces. Each application has its own nuances. You may find some of this section repetitive, since interior brick and exterior may be the same, or are they? Some interior brick is sealed or varnished; some has been painted. So do not assume that the interior surface will be the same just because it is the same material.
Also, DO NOT PRICE INTERIOR JOBS THE SAME AS EXTERIOR. The interior jobs will require many more labor hours due to the preparation of the surface (i.e., chemical stripping), protection of the interior furniture, lighting, vents, etc. For this reason, we will deal with exterior and interior application in separate sections.
Structural Change, Additions and Other Design Issues:
You may have jobs where you have been asked to change a square entryway to an arched one, or a wood support column to a solid stone one, etc. If you have substantial carpentry experience and the right tools you may want to give a quote. If you do not, then network and get prices from others than can be sub-contracted to do the job.
Exterior Surfaces
Acceptable Types of Surfaces
StoneCoat® adheres to surfaces such as brick, cinder blocks, cement-based coatings and cement stucco without having to put lathe or rough coats. However, in some cases the use of a thin-set adhesive (we use VersaBond®.) will improve the adhesion, especially on a slick surface, although not required. Nevertheless, we must consider the amount of product to be used.
In cases where the surface has deep grout lines in the brick or blocks, you want to avoid having to fill these deeper lines with StoneCoat®, or delaying the drying of these deeper pockets, as this will increase product usage and will slow the carving process. So we recommend troweling or plastering the surface initially with cement ready-mix or rough coat. Additionally, this step will prevent any “shadow effect” that would have resulted if the mortar lines had not been smoothly filled in. Consider the low cost of this as an improvement of your product offering.
On surfaces such as plywood or other smooth wood surfaces, you need to install a vapor barrier (15 lbs. felt paper) and a lath covering. Do not use Chicken Wire or Poultry netting. The honeycombs are too large in size. You want diamond shaped metal lath stapled in place with the edge of the lath that is slightly off horizontal, pointing up. Wide head screws should be used to anchor the lath to the studs. Use a lath that has tarpaper already attached to it for exterior applications. The lath we are referring to goes by the formal name: diamond mesh metallath.
Diamond mesh metal lath, when applied correctly will have the very slight upturn of the diamond pointing up, so its support of the StoneCoat® is maximized. Trimming the lath can be done with hand shears.
On drywall, you need to trowel a coating of VersaBond® or apply lath. StoneCoat® DOES NOT adhere to varnished surfaces, so you will need to put lath or chemically strip the surface and apply VersaBond®.
It is of crucial importance to keep all cementitious substrates moist to avoid cracking!
Insulated Concrete Forms (ICF)
A fast-growing trend is to build homes faster, more insulated and with less wood. Two environmental concerns are being addressed by ICF. The first is the emissions and fuel burning for heating and cooling of homes; the second is the destruction of forests for wood.
Insulated Concrete Forms as described by the Insulated Concrete Forms Association (ICFA) are:
ICF are basically forms for poured concrete walls that stay in place as a permanent part of the wall assembly.
The forms, made of foam insulation, are either pre-formed interlocking blocks or separate panels connected with plastic ties. The left-in-place forms not only provide a continuous insulation and sound barrier, but also a backing for drywall on the inside, and stucco, lap siding, or brick on the outside. Source: icfa.org
The foam on these structures is where we apply StoneCoat®. To apply to these surfaces, you need to apply thin-set (interior and exterior walls) initially.
In some cases,” impact netting” is applied to the exterior wall. ALWAYS ASK THE BUILDER OR YOUR CLIENT IF THEY WILL BE APPLYING THIS NETTING. If they are, you can apply thin-set right over the netting once it is installed. The impact netting is sticking with adhesive. It sticks to the foam and is very thin, so it does not hinder the application of thin set. You must be somewhat cautious not to catch the teeth of your trowel and pull the netting away, but generally it is pretty much adhered and thin enough to not disturb your troweling.
Plywood Surfaces
Steps for preparing the surface.
Step 1. Inspect the whole surface. Make sure the plywood is properly secured, has no holes or loose panels. In the case of existing plywood that was previously covered by brick, siding or other material, look for damage, mold, or rot. If any damage or detrimental conditions are found, you will need to repair/replace them before beginning.
BE SURE TO ADVISE YOUR CUSTOMER OF EXISTING STRUCTURES THAT NEED REPAIR, IF FOUND, AND THAT THEY WILL NEED TO PAY FOR THE COST OF THIS REPAIR. ALSO, SHOW THE HOME OR BUSINESS OWNER THE DAMAGED AREAS SO THEY CAN SEE WHY YOU MUST REPAIR. DO NOT TELL THEM BY PHONE AND ASSUME THEY UNDERSTAND THE EXTENT OF THE DAMAGE YOU WILL NEED TO FIX.
Step 2. Roll out and cut the tar paper lath (2.5 lbs. galvanized) and fix to the surface with a good quality staple gun. FOLLOW THE MANUFCTURER’S SUGGESTIONS AND STANDARD
ACCEPTED CONSTRUCTION PROCEDURES. The only acceptable alternatives to tar paper lath is to use builder’s paper or Ty-vet® over the plywood and then apply the lath.
On corners, be sure to mold the lath tightly (or use cornerite, a pre-made 90º lath corner; also called corner bead) and that all the area is covered and congruent with the shape of the corner. Do not leave any of the plywood not covered by lath. If you do, the product will not adhere, and you will have a weak area of coating.
Step 3. Cover and protect all windows, ledges, doors, etc. Cover and protect all vegetation. See section on protecting vegetation and landscaping.
Step 4. Begin the Product Preparation and Mix for Spraying.
If you fail to use the tarpaper lath over plywood, the product will crack because the plywood will absorb moisture and shift. This means your substrate has shifted. You will have to re- spray, re-pigment, and re-carve. This is very costly.
When you spray over lath it is necessary to spray an initial rough coat just thick enough (1/4”) to cover the lath. Allow this coat to dry for 24 hours, depending on weather conditions. Anytime you are applying StoneCoat® over a newly constructed wood surface be aware that if there has been a significant amount of rain a great deal of moisture has been absorbed by the wood product. This moisture will at some point dry either through warm temperature or the A/C unit when the house is completed. When this drying occurs, there is the potential for movement of the substrate. That is why it is necessary to let the rough coat thoroughly harden before applying the final coat on this type of surface.
Brick Surfaces
If the brick is newly installed, you must wait 30 days from installation of the brick to ensure that it has cured. If the grout lines are deep, consider rough coating to avoid using too much product to fill the existing deep grout lines.
Painted brick surfaces
The paint on these surfaces has now created a smooth surface and additionally the paint is now the substrate that StoneCoat® will bond to. So, we need to ensure that the paint is a sound film to bond with. Follow these steps:
-
- Select a discrete brick. One that is out of immediate line of sight.
- Take a knife and cut horizontally lines that are 1/8” apart.
- Now, cut lines 1/8” apart vertically.
- Now you have a lot of small squares of paint:
-
- If over 20% of the squares flake or fall off, you must strip the surface. Then use thin set.
- If over 80% of the paint squares stay attached, then you can apply thin-set and spray the wall after the it is dry to the touch.
Stucco or other Cement based Coatings (includes adobe straw mixes)
While our product will adhere to these surfaces, be sure to carefully inspect these surfaces for moisture or vapor pockets, cracks, flaking material or general conditions. Usually these are being replaced because they are poor coverings and are aged and damaged. DO NOT let your job’s success be undermined by a poor substrate.
Most of these coatings are installed on lath, so you must be able to ensure that the surface is well attached to the original lath.
If the surface is questionable or appears to have hidden moisture and vapors (especially prevalent with EFIS or synthetic stucco), you need to discuss with your customer the cost of repair or removal of the substrate.
IF THE SURFACE HAS BEEN DONE IN EFIS IT MUST BE REMOVED DOWN TO THE PLYWOOD AND THEN LATH THE PLYWOOD.
You may consider scoring the surface to ensure that you have removed all the pockets of moisture or vapors and increase the adherence of the material to the substrate (lath) under the stucco.
The basic concept is that we all know that one of the problems with poorly installed stucco is vapor and moisture pockets, flaking and other poor conditions. You must ensure that your product will be able to adhere to a substrate in good condition. Consider quoting the removal of the stucco and lathing again to ensure a well-done job. DO NOT FORGET TO INSPECT THE CONDITION OF THE SUBTRATE THE STUCCO WAS ORIGINALLY APPLIED TO.
Follow the same procedures that you would on any wall for removing mold, rot and other natural elements, using brushes, a pressure washer, or chemical treatment.
Step 1. Inspect the surface using the general guidelines above. Perform any repairs, scoring or removal of stucco.
Step 2. Re-lath or rough coat any areas of concern.
Step 3. Moisten the area with water. Keep moist.
Step 4. Mask and protect windows, doors, etc. and vegetation and landscape. See section on protecting these items.
Cinder Block or other Cement based Blocks
Follow the same procedures that you would on any wall for removing mold, rot, and other natural elements, using brushes, a pressure washer, or chemical treatment. Follow the same steps as in Brick Surfaces for Painted concrete.
Step 1. Inspect the surface using the general guidelines above. Perform any repairs, scoring or removal of stucco.
Step 2. Rough coat any areas of concern. Use VersaBond® if necessary.
Step 3. Moisten the area with water. Keep moist.
Step 4. Mask and protect windows, doors, etc. and vegetation and landscape. See section on protecting these items.
Smooth Cement Surfaces
If the wall is new allow 30 days for curing, before applying product.
These surfaces can be so smooth that the product will not bond, so you should use VersaBond® prior to applying StoneCoat®.
If you are concerned about the corners being uneven or damaged, you may want to consider reinforcing them with flat wooden stakes and lath over these.
Step 1. Inspect for damage and apply cement rough coat. Let dry and once it is dry, wet the surface.
Step 2. Prepare and mix product for spraying.
Walls, Fences and Other Surfaces
Other walls such as stand-alone landscape features and retaining walls can also be covered. Ensure the structure is sound and strengthen corners or other areas with flat wooden stakes, or re-cast corners prior to applying product. Be sure to lath over wooden stakes. Apply rough coat if you have any concerns about the surface or use of too much product.
Weather
Consideration of Weather Conditions – One of the most important aspects of your knowledge.
StoneCoat® goes through a transformation process when water is added. As it is applied it begins to cure. If it dries too fast, you will see fissures in the surface. While these fissures do not go all the way to the substrate material, they do make it look like the product is cracked.
If the day is windy be sure brick and block are kept wet, prior to application. If the underlying substrate is moist this will slow down the drying period.
If the day is hot, then you want to be sure that the underlying substrate has been cooled off by wetting and is kept wet prior to application.
ONLY APPLY ON VERY WINDY DAYS IF YOU CAN PROTECT THE AREA, AND NEVER APPLY WHEN FREEZING WEATHER IS PRESENT. On very hot days (over 90°) be sure to wet the brick or block walls to keep them cool during application. You may want to consider using a misting hose to keep the surfaced moist or use plastic to surround the area and wet the plastic on the outside to create humidity on the wall surface.
Freezing Weather or Expected Freeze
While the product is frost resistant, the coating should not be exposed to a freeze. It can be covered with a tarp, or an accelerator can be put in the mix to speed to reduce moisture content below the capacity for freezing. Never spray in freezing temperatures.
For example:
You spray a surface, and the temperature is expected to drop that evening or afternoon to freezing. You want to only spray enough area that you expect at least 80% of the moisture to be evaporated. Since there is no practical way to measure moisture, protect your work by covering it, and keep it covered for the whole expected freezing period.
IN GENERAL, THE FIRST 7 DAYS OF CURING ARE CRITICAL SO IF YOU HAVE ANY EXPECTATIONS OF NON-FAVORABLE WEATHER CONDITIONS, SUCH AS FREEZING, PROTECT YOUR WORK.
Second Layer Issues
When applying a second coat of the product on existing (not cured) StoneCoat®, it is imperative that you are aware that drying time will max out at approximately 90 minutes. You will have to pace your work within this time frame. Also, you must re-wet the StoneCoat® surface before applying the second coat. For interiors this will require sponging. For exteriors, light spraying with a hose.
Masking and Taping
For those of you that have ever masked or protected surfaces to paint you will have to learn a different way. Paint is a very thin surface, whereas our product is at least ½ inch thick in the thinnest areas. So, if you put tape jutted up against the frame of windows, when you pull it off you will pull product that has not cured. Therefore, you must consider the thickness of our product coating and tape back the same distance. So, if adjacent the window or door you will have ½ inch thick product you want to leave at least ½ inch exposed, if it is 1 inch then 1 inch and so on. SO, REMEMBER THE EXPECTED PRODUCT THICKNESS WHEN YOU GO TO MASK OR TAPE AN ITEM FOR PROTECTION.
Interior surfaces
Note: if the interior is new construction and will be exposed to weather condition such as freezing, please follow the appropriate instructions for weather conditions.
Wood Surfaces
Do not assume that the brick or wood in the interior of a home is raw. In many cases it is sealed with a sealant, varnish, or paint. Be sure to remember you will have to strip to the raw wood THEN, lath the wood. Brick will have to be blasted or stripped. Fortunately, few fireplaces made of brick or other material are sealed or varnished. So, in general, you do not have to worry about it with fireplaces.
Step 1. Inspect the whole surface. Make sure the plywood is properly secured, has no holes, or loose panels. In the case of existing plywood that was previously covered by brick, siding or another material, you must look for damage, mold, or rot. If any damage or detrimental conditions are found, you will need to repair/replace them before beginning.
Step 2. If you are not using thin set, roll out and cut the lath and fix to the surface with galvanized hooks or clips. FOLLOW THE MANUFACTURER’S SUGGESTIONS AND STANDARD ACCEPTED CONSTRUCTION PROCEDURES. On corners, be sure to mold the lath tightly and that all the area is covered and congruent with the shape of the corner. Do not leave any plywood uncovered by lath. If you do, the product will not adhere, and you will have a weak area of coating.
Step 3. Cover and protect all windows, ledges, and doors, etc., cover and protect all vegetation. See section on protecting vegetation and landscaping.
Step 4. Begin the product preparation and mix for spraying.
Brick Surfaces
If the brick is newly installed, you must wait 30 days from installation of the brick to ensure that it has cured.
Painted brick surfaces
The paint on these surfaces has now created a smooth surface and additionally the paint is now the substrate that the StoneCoat® will bond to. So, we need to ensure that the paint is a sound film to bond with. Follow the following steps:
-
- Select a discrete brick. One that is out of immediate line of sight.
- Take a knife and cut horizontally lines that are 1/8” apart.
- Now, cut lines 1/8” apart vertically.
- Now you have a lot of small squares of paint:
-
- If over 20% of the squares flake or fall off, you must strip the surface. Then use thin set.
- If over 80% of the paint squares stay attached, then you can apply thin-set and spray the wall after the it is dry to the touch.
Step 1. Inspect the wall. Look for holes or mortar breaks. Look for mold or other debris. Clean these areas well. If mold is persistent then use a chemical anti-mold product. Bottom line is that the surface must be clean.
Step 2. Make sure that the cleaning was adequate, and the wall is dry from any cleaning fluids used.
Step 3. Mask and protect all areas you do not intend to spray, like windows, doors, vegetation etc. See section on how to protect these.
Step 4. Begin to prepare and mix product for spraying.
Drywall Surfaces
Step 1. Inspect the drywall. Make sure it is properly attached and all nails and joints have been covered with compound and tape as per standard drywall installation procedures. If there are tears or gaps, they must be taped and/or covered with compound. Remove and replace any rusted nails and replace any drywall that has been damaged by moisture. Just because the moisture stain has dried, does not mean the drywall is sound.
Step 2. Protect all windows, doors, etc., and vegetation. See section on protection of these items.
Step 3. (If not using VersaBond®) Roll out and cut the lath and fix to the surface with galvanized hooks or clips. FOLLOW THE MANUFCTURER’S SUGGESTIONS AND STANDARD ACCEPTED CONSTRUCTION PROCEDURES.
Step 4. Prepare StoneCoat® for spraying
Insulated Concrete Forms (ICF)
On the interior ICFs are usually covered with drywall. In these cases of a StoneCoat® application, just apply thin set onto the drywall. If the ICF is left bare on the interior, apply the thin set onto the ICF without any netting.
Protection of the Home or Business Interior
Your customer’s furniture, knick-knacks, pictures, paintings, etc., will be exposed to dust, especially if you will be using trowels to smooth the product. YOU MUST PROTECT THE INTERIOR OF THE HOME FROM DUST.
BE SURE THAT WHEN YOU WASH OUT YOUR EQUIPMENT IN ANY DRAINAGE THAT YOU FOLLOW IT WITH LOTS OF WATER! If too much product stays in the pipes you will be called back to unplug the pipes!
Be sure to close and tape the air-ducts of the air-conditioning and / or heating system. If you don’t, the customer will call complaining that his sheets, towels, etc. are covered in dust.
Electrical outlets and cables must be protected. YOU DO NOT WANT TO SPRAY ON EXPOSED WIRING!
Interior Plants – remove plants from the area; if they are too heavy try to cover them with a bag of some sort. Be sure to uncover them after!
Flooring care – Even though you will be able to vacuum the floor and carpet, be sure to avoid having them exposed to too much dust. Use a drop cloth. NEVER LEAVE THE FLOORING UNCOVERED, EVEN IF IT IS TILED.
Pictures and Paintings – Remove them. BE CAREFUL OF HOW THEY ARE HUNG AND DO NOT DAMAGE THE HANGING FIXTURE.
Furniture – Be sure to cover all the furniture. Windows, Doors and Frames – Mask and cover them.
USE COMMON SENSE. LOOK AROUND THE AREA; IS THERE ANYTHING THAT WILL GET DUST, SUCK DUST TO OTHER AREAS OF BUILDING OR CAUSE A RESIDUE FROM YOUR JOB TO BE THERE AFTER YOU LEAVE? If so, then protect it!
Product Mixing and Application
A concrete mixer with a 6 cubic feet capacity is necessary to mix five bags of StoneCoat® at the same time.
The StoneCoat® sprayer has a hopper on top to hold the product and a long trigger to control the amount sprayed.

Mixing
BEFORE YOU START, PUT ON A FACE MASK AND PROTECTIVE GLASSES.
Step 1. Locate the place for the mixer and bring the water hose within reach and put a sprayer head on it.
Step 2. Start your mixer and add approximately 1 and 1/4 gallons of water.
Step 3. Add your first bag of mix.
Step 4. Add your second bag of mix. It will now absorb a lot of the wetness, turning the slurry to a dry paste. Keep the mixer running.
Step 5. Pour another 1 and1/4 gallons of water into the mixer bringing the mix to a wet paste, NOT back to a slurry consistency. A thick wet paste is what you are looking for.
Step 6. You should see the mix not sticking to the bottom of the mixer, but still be pasty. If you note some dry powder spray a little water on it.
Let the mixer run until you believe all the moisture has blended with the mix.
Note: GET YOUR SPRAYER READY AND PRIME THE COMPRESSOR.
Let mixer run for 3-5 more minutes and watch the product blend. DO NOT be tempted to add more water to StoneCoat® as it mixes will become wetter to the sight, EVEN if it looks like there is initially not enough water. DO NOT HURRY! Wait a couple of minutes to see the consistency before you add any water. NOW you only add water if you believe it is too thick and looks like dry clumps are present in the center. Do not add too much. Just 2-3 spurts of spray should be enough. Soon you will see the paste begin to waterfall off the mixer’s bevels front end and cone as it goes through the holes in the bevels. This cascading off the bevels and the coning lets you know you have the right consistency. (You will get a good visual experience and be able to get it right all the time)
Step 7. Turn off mixer. Dump product into wheelbarrows.
Preparing to Spray (while product is mixing)
A high-quality air-compressor with adequate horsepower and CFM capacity is necessary. A 20-gallon tank or larger is recommended. Regular maintenance is prudent.

The two-stage valve seen at left is usually an adaptation bought separately. One valve can be set for StoneCoat® spraying and the other for pigment spraying. Gauges indicate the psi level, which is easily adjusted by the knobs below each gauge.
The pigment spray valve is usually set at 40-60 psi. The StoneCoat® spraying valve is usually set at 120-140 psi.
Compressor Setting
Your compressor needs to have a valve to regulate output. You need to know what constant pressure is output when you spray. We recommend from 90 psi to 120 psi while spraying. Depending on whether you are spraying on lath or brick you will need to look at the first spray and make sure it is bonding and not too grainy.
Wheelbarrow Placement
Place the wheelbarrow next to the mixer. Tip the mixer to fill the wheelbarrow. Wheel the wheelbarrow as close to the area that is going to be sprayed. You will scoop product into the sprayer hopper, so you want it as near as possible.
Spraying
Spray from 4 to 8 inches from surface. The hopper will allow you to spray about a 30- inch line. Take your time being careful to keep a uniform thickness. DO NOT RUSH, if you do you will double the spraying time having to go over areas since the thickness will too thin. Be sure to avoid, as much as possible the sprayer nozzles spraying just air on the surface. This will cause holes or ripples.
MOVE to the corners, if any, and spray them to the desired thickness, THEN fill in the area in between.
Use a simple depth gauge to determine if the StoneCoat® has been sprayed on to the desired thickness. If it is not thick enough, then spray at a faster pace to get it to the thickness. If at this point you move the sprayer too slowly, it will increase the thickness beyond what you are trying to correct.
For protruding or other stone features, hold the sprayer steady until it lumps up. This will allow you to get the natural curves and lumps of stone when you carve.
For large cornerstone blocks, DO THEM FIRST, spray a 1” (one finger joint) thickness, THEN, WORK THE REST OF THE SURFACES, when the surface is almost dry, then spray the next 1”. This will allow the large cornerstones to be carved up to 2”.
After the product has set for about 30 minutes to 1 hour, check your work and touch up any areas as needed. Small cracks may appear if the StoneCoat® was too wet and has moved. Go back and hand smooth out any small cracks.
Cleaning and Maintenance
Very little product will remain on your tools and in the mixer and sprayer. The Product that is on the tools should be cleaned as soon as possible. It is very easy to clean, so take the time to clean. The helper can begin cleaning the equipment as soon as the final batch is delivered to the applicator.
You are working with lime so remember to clean well.
If you are going to have cornerstones, then be sure to take a carving tool and make the cornerstone lines USING the level. These lines will remind you to not pigment the cornerstone UNLESS they will be pigmented a different color than the grout lines.
Pigmenting
Mixing and Spraying Pigments
You will use a standard paint sprayer for the application of pigments. REMEMBER THAT IF YOU ARE DESIGNING CORNERSTONES THAT ARE GOING TO BE THE SAME COLOR AS THE GROUT LINES, DO NOT SPRAY THEM WITH PIGMENT. PROTECT THEM FOR THE PIGMENT SPRAY.
Look carefully at the hues and color tones of the selected design your customer wants. Beforehand, select the pigments jar you will use and take them to your work area. BE SURE TO NOTE AREAS OF THE DESIGN THAT WILL NOT BE PIGMENTED AND AVOID PIGMENTING THEM.

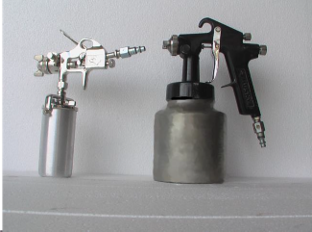
Sprayers for pigmenting can range from the detail spray gun seen on the left, the standard paint spray gun seen on the right, or other types of gravity spray guns.
All natural pigments are used to achieve a wide range of colors, tones, and hues in the limestone.
-
- Olive
- Natural
- Black
- Arizona Gold
- Red
- Brown (light, medium, chocolate, dark)
The more pigment the darker, the less pigment the lighter. HOWEVER, THE PIGMENT WILL FADE TO A LIGHTER COLOR DURING THE FIRST 48 HOURS, SO BE SURE TO KEEP THAT IN MIND!
If you pigment too soon on very wet product, the pigment will lighten more. YOU NEED TO PIGMENT SOON AFTER SPRAYING, SO KEEP THIS IN MIND. IT IS BETTER TO PUT A HIGHER VOLUME OF PIGMENT IN THE SPRAYER AND APPLY IT WHILE WET. If the product is too wet, the pigment might run, due to saturation of water.
The pigments require very little quantity to effectively “color” StoneCoat®. For example, for a light brown you would need just one teaspoon per sprayer barrel. Fill the sprayer barrel/jar with water, cap and shake vigorously.
Spray the pigment in a quick motion across the surface, imagine in your mind where the stones will look darker and lighter and of different colors. Then spray according to this mental vision you have developed. For colors you just want a faint hint of, spray quicker and shorter bursts. For colors you want darker or more prominent hues spray slower with longer bursts.
Clean the sprayer well with water, mix your other pigment color and repeat the spraying process.
Stand back and look at your results. Touch up where needed. HINT: Stand back frequently and look at your results. Be sure that you are satisfied and finished with that color of pigment. This will avoid having to use more pigment for touch-up.
NOW–CLEAN ALL YOUR TOOLS USED FOR SPRAYING AND MIXING, IF YOUR HELPER HAS NOT DONE SO ALREADY.
AS SOON AS THE SURFACE IS DRY TO THE FINGER YOU CAN BEGIN CARVING.
The cornerstone smoothing, if any is desired, needs to be done last.